Kubernetes External IP service type
When building a baremetal Kubernetes cluster, you might face a common problem as I do where you don’t really know how to expose your Kubernetes service to the Internet other than using NodePort. If you are using NodePort service type, it will assign a high port number to be opened and you have to allow your firewall rule to connect to those ports. That is not good for your infrastructure especially when you’re exposing the server to the outside Internet. Well, there is another neat way to expose your Kubernetes service to the world and you can use its original port number. For example, you can expose MySQL service that reside in your Kubernetes cluster to the outside world on port 3306 rather than port 32767. The answer is using Kubernetes External IP service type.
Personally, I find that this topic not widely discussed among Kubernetes community, probably because many are using cloud providers’ Load Balancer or use Metal LB for on-prem deployments.
What is External IP Service#
From official Kubernetes documentation, this is how External IP is described
If there are external IPs that route to one or more cluster nodes, Kubernetes Services can be exposed on those
externalIPs. Traffic that ingresses into the cluster with the external IP (as destination IP), on the Service port, will be routed to one of the Service endpoints.externalIPsare not managed by Kubernetes and are the responsibility of the cluster administrator.
The explanation is understandable for most people. The most important thing here is to be sure which IP is used to reach the Kubernetes cluster. Using external IP service type, we can bind the service to the IP used to connect to the cluster.
It is good if you briefly know how Kubernetes networking works. If you are not familiar with it, do check out this blog post written by Mark Betz to understand them in detail. The most important this to know here is that the Kubernetes network works with Overlay network. This means that once you reach any of the nodes (master or worker node) in the cluster, you can virtually reach everything in the cluster.
This is how they’re illustrated
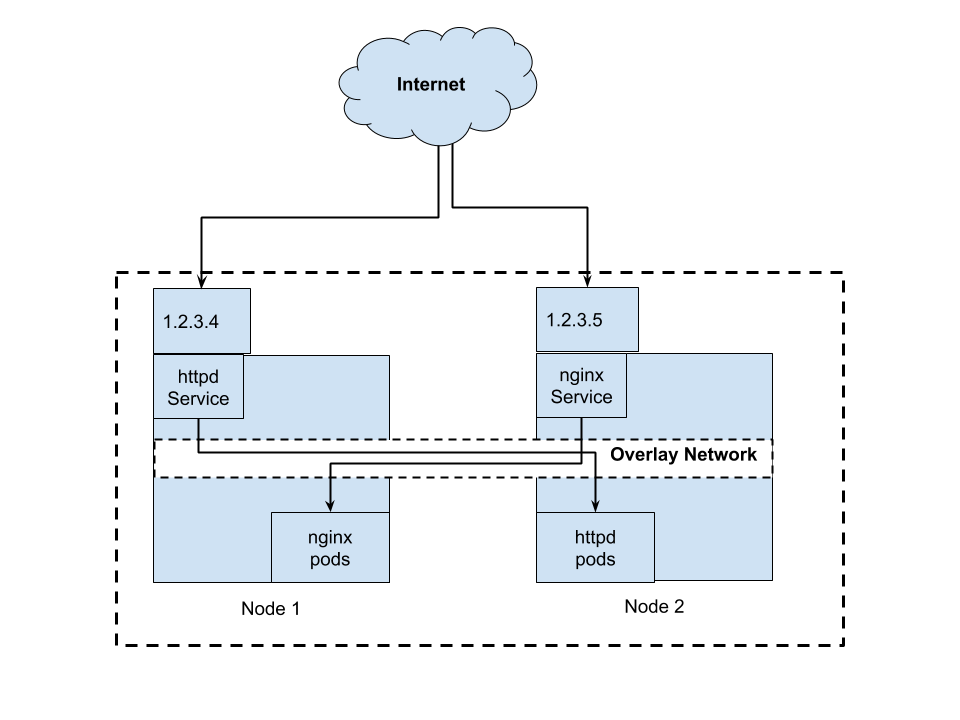
In the diagram above, both Node 1 and Node 2 has 1 IP address. The IP address 1.2.3.4 on Node 1 is bind to httpd service where the actual pod reside in Node 2 and the IP address 1.2.3.6 is bind to nginx service in that the actual pod reside in Node 1. The underlying Overlay network makes this possible. When we curl IP address 1.2.3.4, we should see response from httpd service while curl 1.2.3.5, we should response from nginx service.
Why not use Ingress?#
Even though Ingress is used to expose service to outside, Ingress is built for L7 routing. This means it built to support HTTP (port 80) and/or HTTPS (port 443) traffic and not for other ports. Ingress works as host based routing or similar to virtual host in Web Server world. Some ingress controllers able to serve other ports or may provides workaround for L4 routing but I have never actually experiment with them.
Advantages & Disadvantages of External IP#
The advantage of using External IP are:
- You have full control towards the IP that you use. You can use IP that belongs to your ASN instead of cloud provider’s ASN.
The disadvantage of External IP are:
- The simple setup that we will go thru right now is NOT highly available. That means if the node dies, the service is no longer reachable and you’ll need to manually remediate the issue.
- There are some manual work needs to be done to manage the IPs. The IPs are not dynamically provisioned for you thus it require manual human intervention.
How to use External IP service#
Our setup#
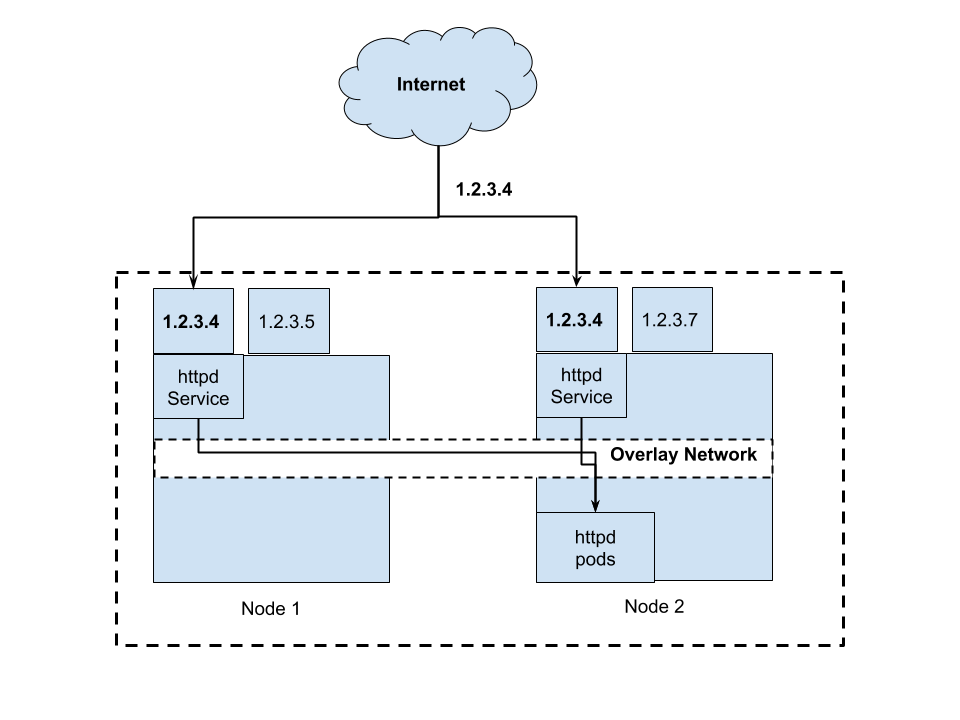
Again, we will use the same diagram as our reference for our cluster setup, except with different IP and different hostname. This is not a good real life example, but it’s easy to distinguish which is which when we’re verifying the setup. In real life example, you might want to expose MySQL DB on 1 external IP and Kafka cluster on another external IP.

I have provisioned 2 VMs for this tutorial. k3s-external-ip-master will be our Kubernetes master node and has IP of 1.2.4.120. k3s-external-ip-worker will be Kubernetes worker and has IP of 1.2.4.114.
Step 1: Setup Kubernetes cluster#
Lets install k3s on the master node and let another node to join the cluster.
$ k3sup install --ip <master node ip> --user <username>
$ k3sup join --server-ip <master node ip> --ip <worker node ip> --user <username>
You should be seeing something like this now
$ kubectl get nodes
NAME                                 STATUS   ROLES    AGE     VERSION
k3s-external-ip-master               Ready    master   7m24s   v1.16.3-k3s.2
k3s-external-ip-worker               Ready    <none>   2m21s   v1.16.3-k3s.2
Step 2: Create Kubernetes deployments#
We will create nginx deployment and httpd deployment.
$ kubectl create deployment nginx --image=nginx
$ kubectl create deployment httpd --image=httpd
You should be seeing this now
$ kubectl get pods
NAME                     READY   STATUS    RESTARTS   AGE
nginx-86c57db685-fzxn5   1/1     Running   0          22s
httpd-7bddd4bd85-zk8ks   1/1     Running   0          16s
Step 3: Expose the deployments as External IP type#
Lets expose the nginx deployment
$ cat << EOF > nginx-service.yaml
apiVersion: v1
kind: Service
metadata:
  name: nginx-service
spec:
  selector:
    app: nginx
  ports:
    - name: http
      protocol: TCP
      port: 80
      targetPort: 80
  externalIPs:
    - 1.2.4.114
EOF
And expose httpd deployment
$ cat << EOF > httpd-service.yaml
apiVersion: v1
kind: Service
metadata:
  name: httpd-service
spec:
  selector:
    app: httpd
  ports:
    - name: http
      protocol: TCP
      port: 80
      targetPort: 80
  externalIPs:
    - 1.2.4.120
EOF
Kubectl them
$ kubectl create -f nginx-service.yaml
$ kubectl create -f httpd-service.yaml
Now your Kubernetes services should look like this
$ kubectl get svc
NAME            TYPE        CLUSTER-IP      EXTERNAL-IP   PORT(S)   AGE
kubernetes      ClusterIP   10.43.0.1       <none>        443/TCP   18m
httpd-service   ClusterIP   10.43.240.149   1.2.4.120     80/TCP    32s
nginx-service   ClusterIP   10.43.13.149    1.2.4.114     80/TCP    26s
You might see the service type is ClusterIP here. I am not sure why it does not says External IP instead.
Step 4: Voila!#
Lets curl the httpd service and you should see the Apache default page response.
$ curl -i 1.2.4.120
HTTP/1.1 200 OK
Date: Fri, 20 Dec 2019 03:36:23 GMT
Server: Apache/2.4.41 (Unix) <------
Last-Modified: Mon, 11 Jun 2007 18:53:14 GMT
ETag: "2d-432a5e4a73a80"
Accept-Ranges: bytes
Content-Length: 45
Content-Type: text/html

<html><body><h1>It works!</h1></body></html>
Next, lets curl nginx service and you should see nginx default page response.
$ curl -i 1.2.4.114
HTTP/1.1 200 OK
Server: nginx/1.17.6 <------
Date: Fri, 20 Dec 2019 03:36:01 GMT
Content-Type: text/html
Content-Length: 612
Last-Modified: Tue, 19 Nov 2019 12:50:08 GMT
Connection: keep-alive
ETag: "5dd3e500-264"
Accept-Ranges: bytes

<!DOCTYPE html>
<html>
<head>
<title>Welcome to nginx!</title>
....
What’s next#
Floating IP dedicated for the service#
Most cloud providers nowadays offer Floating IP service. Floating IP allows you to have 1 IP and assign that IP dynamically to any IP that you want. In this case, the IP can be assigned to any worker node in the Kubernetes cluster.
In DigitalOcean (I believe other providers also allow this), you can reassign the IP to other VM using API call. This means that you can quickly reassign the IP to other VM proactively when they’re down, or maybe rotate the IP periodically.
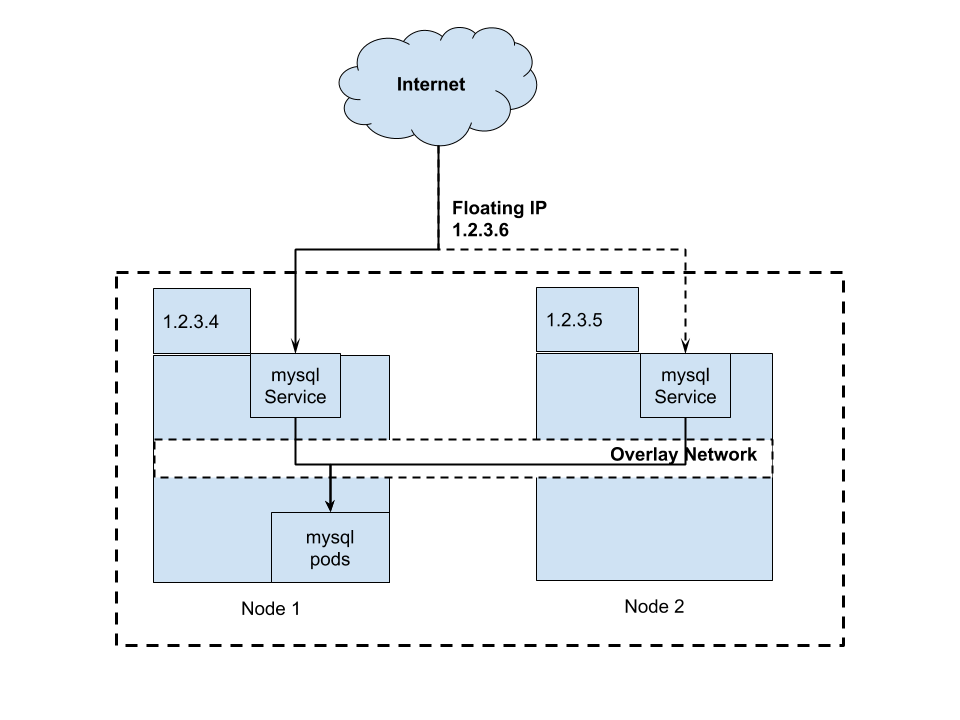
From the diagram, we can have 1 Floating IP 1.2.3.6 that is first assigned to Node 1 and will be switched to Node 2 when Node 1 become unavailable. IP 1.2.3.6 is meant for our MySQL service and will be put in our application configurations.
I have not try this setup yet so I can’t confirm it works. I will update the result in future blog post.
Anycast IP#
You could use Anycast IP as External IP so that they are highly available. For those who are not familiar with Anycast IP, it means that 1 IP may be routed to 2 or more servers. You can read more here. Personally, I am not really sure how to setup this. However, I believe it is technically viable. I think this is the best way to run External IP service.
Conclusion#
There are many options that you can get a IP for bare metal Kubernetes cluster. For example, you can use Inlets and Metal LB for that purpose. This setup might not be the best suit your organization needs. However, it is good to know how you can use this approach.
Disclaimer#
I only use this for experimentation and testing and this article is not meant for production use. Please consult your solution architect or CTO if you’re planning to use this in production.